So in November, for the IGGPPC 31 Days of Christmas Swap, I came across a Youtuber named Sea Lemon, to learn how to make my own slime. Her videos looked promising, but I was so busy over the holidays, that I didn't manage to actually check her channel out fully until January. And then I wanted to make almost everything in her videos!! Like, IMMEDIATELY! lol
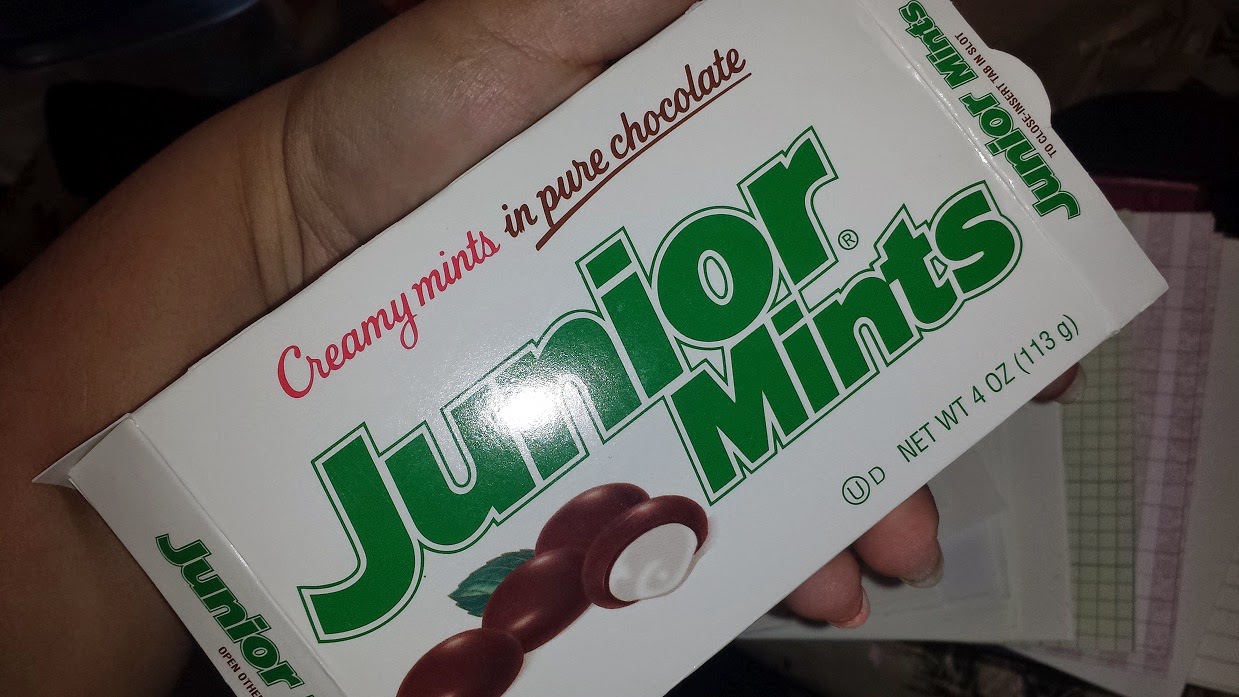
But you have to start somewhere, and I thought the Junior Mint notebook was too cute, and I could make it as a gift for my #LoveYourInnerGeek swap buddy.
I ran out to buy some Junior Mints, and set to the task of eating them all. I needed the box empty, of course.
The video calls for a book press, which I talked to my Boyfriend about trying to make, and he figured that rather than depending on my beginner wood working skills, (and despite the fact that make a book press looks beyond easy) he suggested I get some Ratchet Bar Clamps instead.
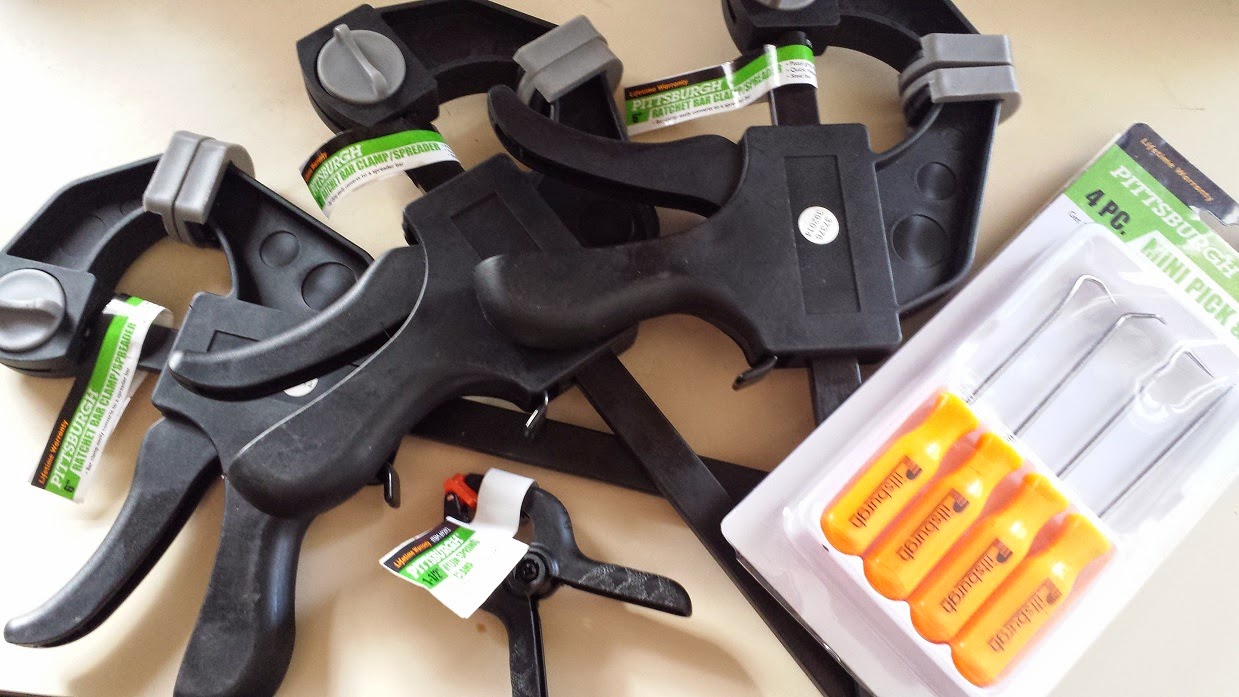
So he took me to Harbor Freight, and after a bit of arguing because I wanted to purchase the tiniest ones they had, convinced me that realistically, the standard sized ones would work better for my purposes. I still maintain that I could have gotten those cute little ones to work well enough... but alas, he was right. I settled for a small spring clamp instead. lol.
Next I set about trimming the paper. The video instructs to fold pages in half, then trim to the exact height of the book. But in my brainstorming, I thought it would be neat to have as many different types of pages as possible. And some of the pages in question were not big enough to fold in half.

So the papers I chose were plain lined paper, fancier lined paper, two types of graph paper, a pretty speckled cardstock, a plain computer paper, a 70 lb. drawing paper, and a 140 lb. watercolor paper. The paper cutter had some difficulty with the thickness of the watercolor paper.
Then I clamped them all together with one long side flush, and added two layers of thick tacky glue.

The stack when dry:

You can see marks that the clamps left behind. I have since acquired two pieces of scrap plywood from my father's last wood project. These pieces of wood work nicely with the clamps to keep the pages flat.
I then trimmed the box, removed tiny bits of chocolate left inside, and sanded it.

So with some spray adhesive, I glued a plain piece of white paper to the inside cover.

Then I scored and folded the cover near the spine as instructed.

From there I hot glued the pages to the inside of the spine, and used that Tacky Glue to finish up.

And now the tricky part. In the video, Sea Lemon uses a utility blade and a ruler to trim the widths of the pages to fit the cover flush.

I began this step with some forced confidence. (I can do this) Only to find that I couldn't. I don't know what I was doing wrong, the blade I used was brand new, but I was unable to get this trick to work. Perhaps it was the varying thicknesses of the pages? Was my ruler not good enough? *shrug*
I ended up with wildly uneven pages, and ugly strips coming out of it.

Being the person that I am, I - naturally - cried at my failure. Then used scissors to try and save the pages. This is where the pictures stop. I think I got so sad that this last step screwed my book up so bad that I stopped bothering with photos.
The end result had some crazy uneven page widths, but in the end, I decided to send it anyway, because it didn't look too terrible. And it was my first attempt at making a book. Looking back for the future, I'm seriously considering skipping this last step and just trimming my pages to the size of the width of the book like I did with the height. It won't be crazy flush and smooth on the edge like hers, but it won't be crazy uneven either.
No comments:
Post a Comment